After using the New Game Wizard to set up your game's Managers, you'll need to configure your project to be in 2D.
Look for the Settings Manager's Camera settings panel, and set the Camera perspective to 2D:

A 2D character is one that is made up of one or more sprites - set up to play different animations according to which direction they're facing. You can use your own graphics to follow along, but here we'll be using those used by the 2D Demo's Player character. These graphics can be found in AdventureCreator → Demo2D → Graphics → Sprites → Brain.
Start by dragging your main sprite into the scene. Here, we're using Idle_D, but whichever sprite you use - be sure to set the asset's Pivot to Bottom, so that the GameObject's origin is around their feet:
![]()
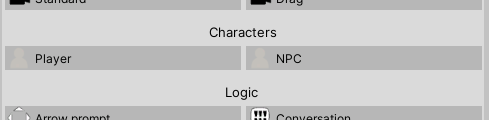
To convert this sprite into a character, select it in the Hierarchy, and then - in the Scene Manager - choose either Player or NPC from the Prefabs panel's Characters section:
This will open up the Character Wizard, which we can use to generate the character after filling in some details. First, we'll need to assign a Base GameObject - if the sprite was selected beforehand, it'll be assigned here automatically. Name the character, and then click Configure:
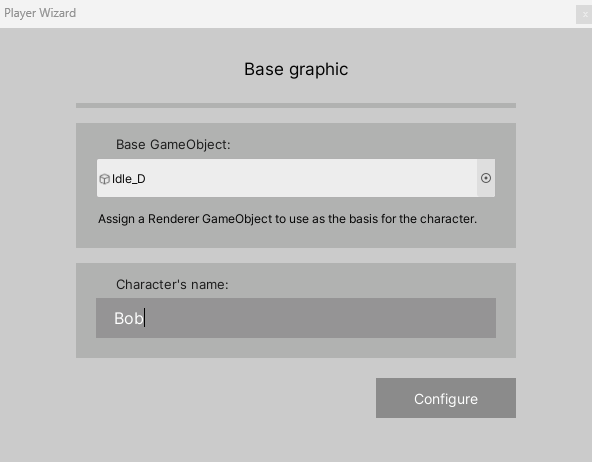
The object you assign here needs to be a GameObject in the scene - not the original sprite asset file.
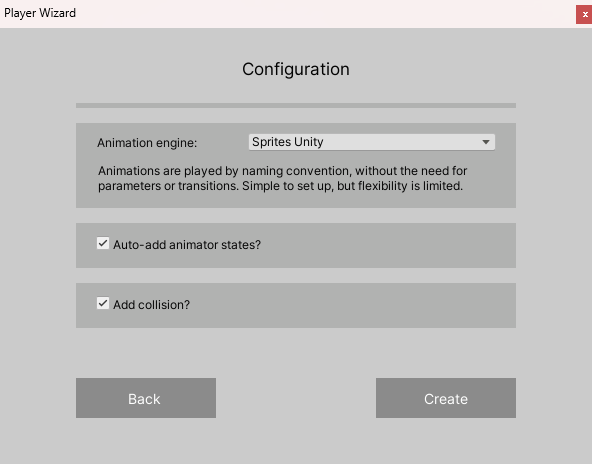
On the next page, we can choose an Animation engine. Here, we'll leave it as the default, Sprites Unity. To have the wizard automatically generate an Animator Controller, click Auto-add animator states?. Then, click Create to create the character:
Our character now takes up three objects in the Hierarchy:
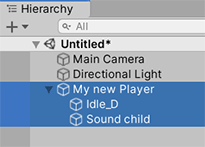
The root object now has a Player or NPC component, which the sprite is now parented to.
A Rigidbody 2D has also been added to the root, among other things. This is only necessary if you wish for the character to collide with other objects. If your game is point-and-click, you can remove this for better performance.
The Player or NPC component will have various settings for movement, but the default values should work fine. What you will need to configure next are the animation settings.
When the Animation engine is set to Sprites Unity, standard animations are played through naming convention - and AC will expect animation names to end with a letter that signifies which direction it is intended for. For example, it will expect an animation named walk_DR when the character walks down-right, and talk_L when talking to the left.
If we opted to have AC auto-create our Animator Controller, these states will be ready-made. Select the sprite object (now a child of the character's root), and select the Animator component's Controller to bring up the Animator window:
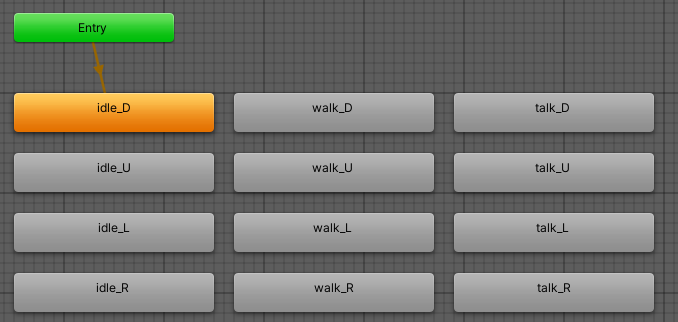
These boxes are empty animation states - you'll need to assign animations to them manually. This can be done by clicking a state, and then configuring the Motion field in its Inspector.
To change the naming convention (for example, BobIdle_D rather than idle_D), edit the Standard 2D animations panel in the character's root Inspector. Clearing a state name, for example "talk", will prevent its associated animation states from being necessary. The Facing directions field can also be used to configure which directions the character can face.
You can see a list of all the standard animations that AC expects, based on these settings, by expanding the List expected animations? foldout just beneath:
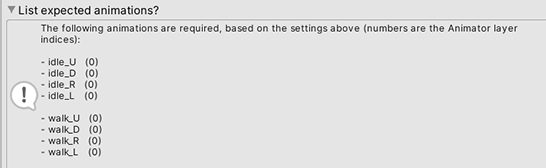
The number after each animation's name indicates the layer that it should be placed in. (0) refers to the Base layer.
If we instead chose Sprites Unity Complex as the animation engine, states are instead played via Transitions and Animator parameters. Here, too, AC can auto-generate a sample Animator controller. Parameter names are similarly configured in the character's root Inspector.
With animation assigned, our character is now ready to appear in a proper scene! One extra thing, though: if this character is intended to be the default Player character, make them a prefab by dropping them into the Project window, and then assign that prefab into the Settings Manager's Player prefab field:
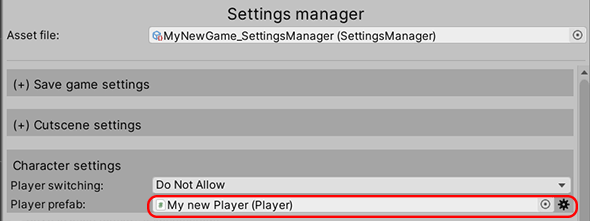
Doing so will cause the Player to be spawned whenever an AC scene is run - meaning you can safely remove the Player from the scene file itself.